How To Make Columns In Google Slides – Quick Guide
Google slides have now become one of the favorite tools for presenters all over the world because of its wide range of features and flexibility. The major benefit of google slides is that it helps you to create amazing slide shows within minutes. And the sad part is that many of us even don’t know the exact capabilities of google slides. Sometimes, you might need to add columns and rows in Google slides. This helps organize your data more professionally, and your audience finds the follow-up easier. You can also include tables in your presentation to show a certain set of data. This guide shows the step-by-step procedures on how to add columns in google slides.
How to make two columns in google slides?
There are different methods by which you can add two columns to a slide. The below examples give a detailed idea of how you can do this.
How to add columns in google slides?
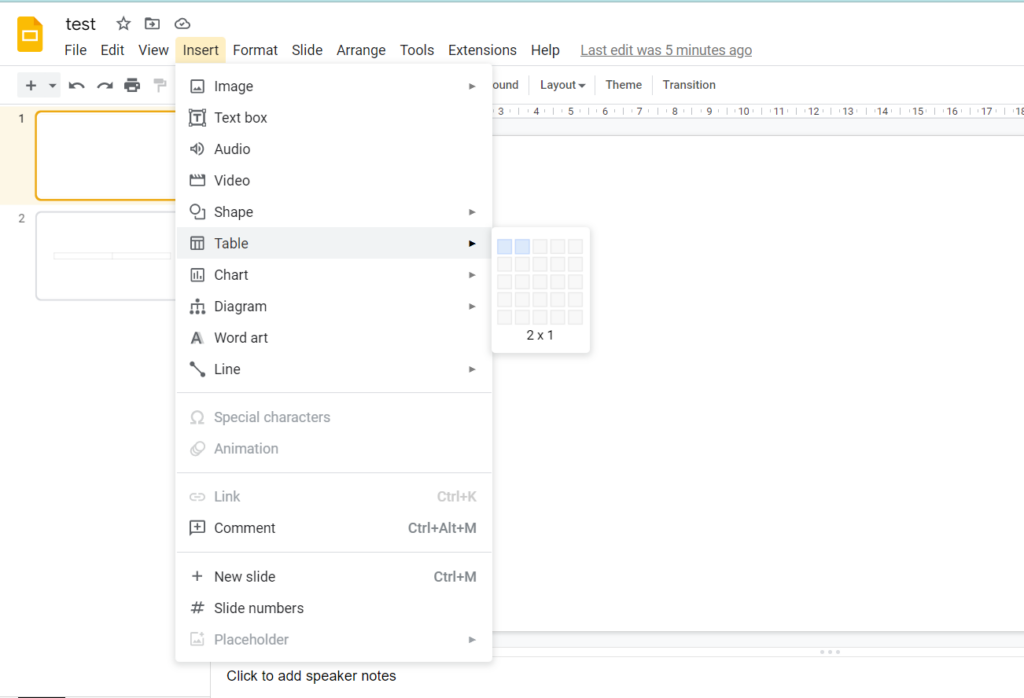
You can add up to 20 rows and columns in a single slide. Here, I am taking a matrix with two columns and a single row as an example. First of all, insert a new slide or select the slide in which you want the columns to be inserted. Then click on the Insert button on the top menu bar. After that, select the Table option from the drop-down list. Finally, select the 2×1 option by hovering over the columns.
Hurray! Now, you have the required two columns. You can edit this matrix by changing the dimensions of each column and row. You can add more columns and rows or delete existing ones by right-clicking after selecting a column. Try out the different color variations and border adjustments to look your columns better.
How to make text columns in google slides?
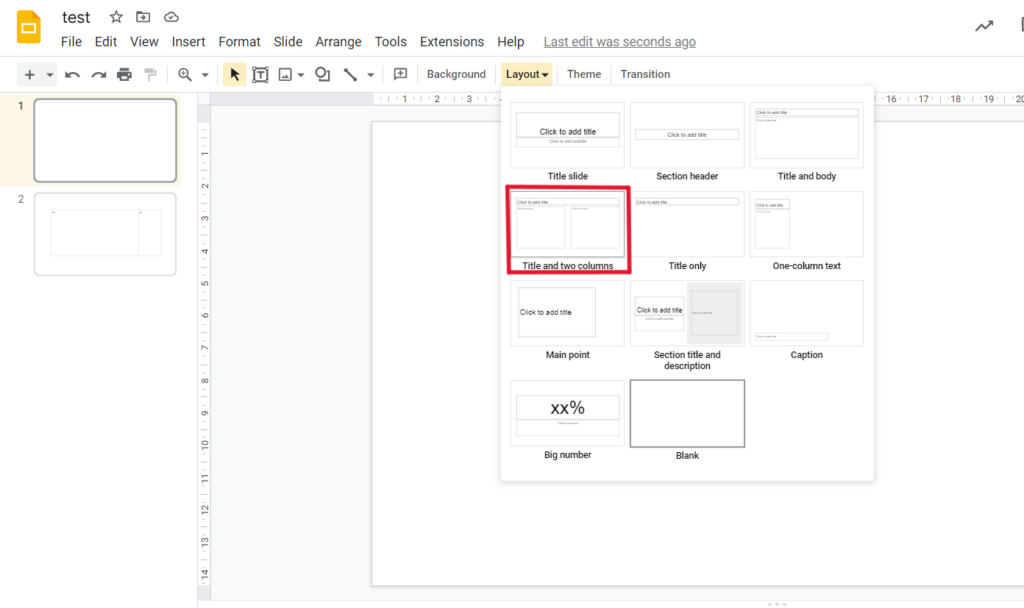
To make a new layout with two google slides text columns, click on the down arrow next to the + icon on the top menu bar. Then choose the ‘Title and two columns’ option from the drop-down list. You can also change the layout of an existing slide. To do so, select the slide, and click on the Layout button from the top menu bar. Then choose the ‘Title and two columns’ options. Delete the title part if it is unnecessary.
There are many options to edit this text box. You can copy and paste the text box to get the required number of text boxes. You can adjust the size and reposition these google slides text boxes to get your desired style. The main difference between these two methods is that the first method allows you to create a matrix with 2 columns and 1 row. The second method creates two columns, but they will be separate.
How to add/edit a table in google slides?
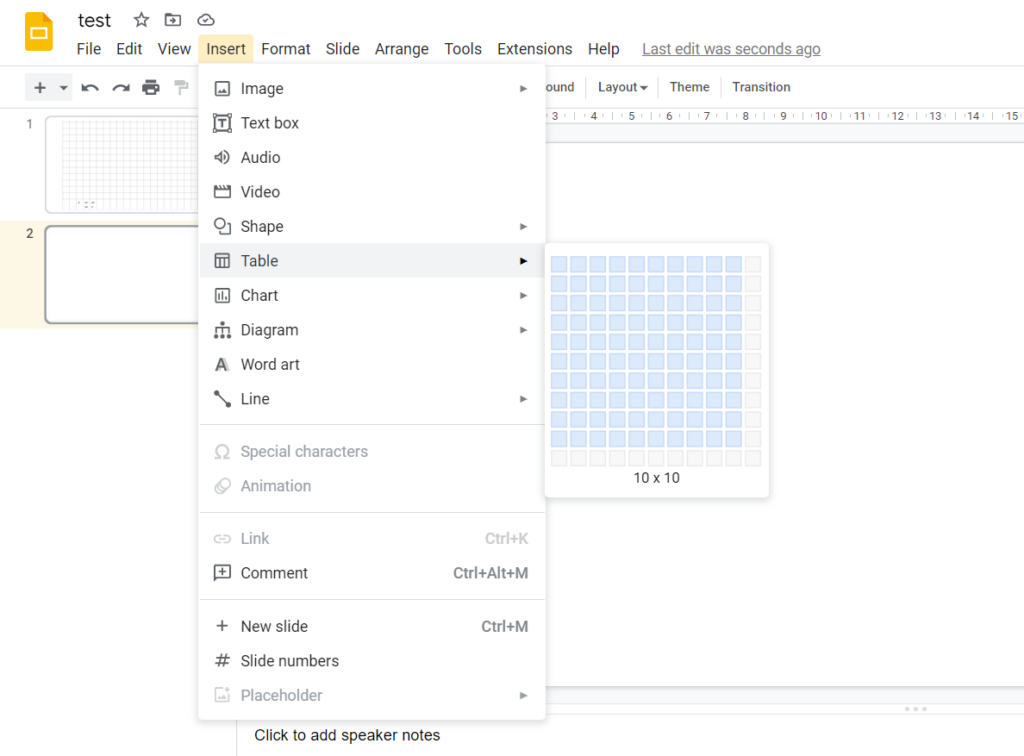
The google slides presentations allow you to insert multiple columns and rows in a single slide. The Table option allows you to insert a table with a maximum of 20 rows and columns(20×20 matrix). For making a new table, select the slide where you would like the table to be inserted. Then click on the Insert button on the top menu bar and select Table from the drop-down list. Then hover over the cells and columns to insert the required number of rows and columns. You can see that the columns and rows will increase as you hover over them horizontally and vertically.
The size of the cells will increase as you add more content to them. In addition, you can adjust the text position and size of rows and columns and add animation to the table. The border size, color, and position can be adjusted by using the Format button. You can find more options to customize the table according to your requirements.
Adding a table directly from a template
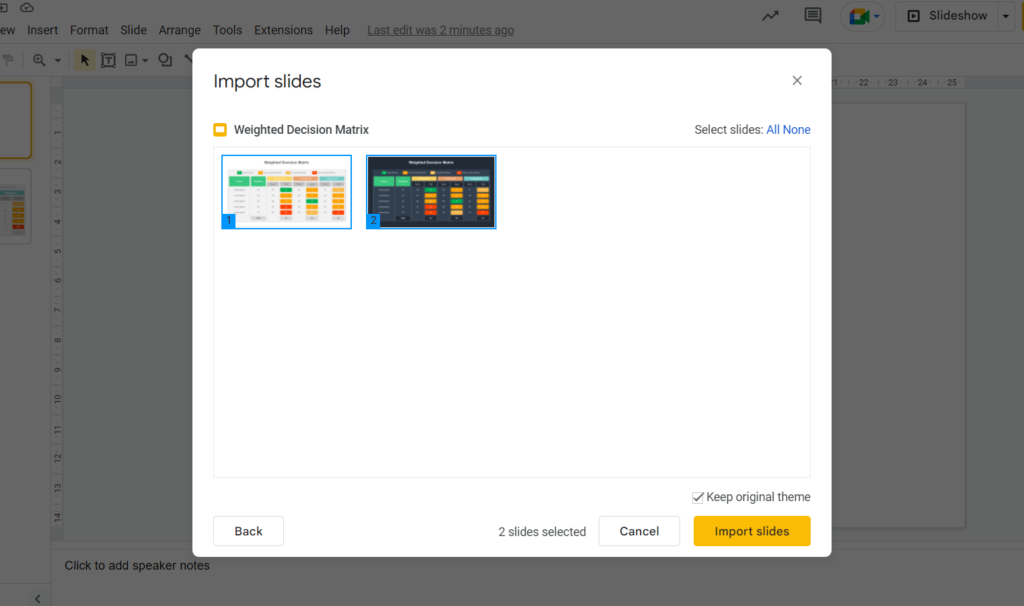
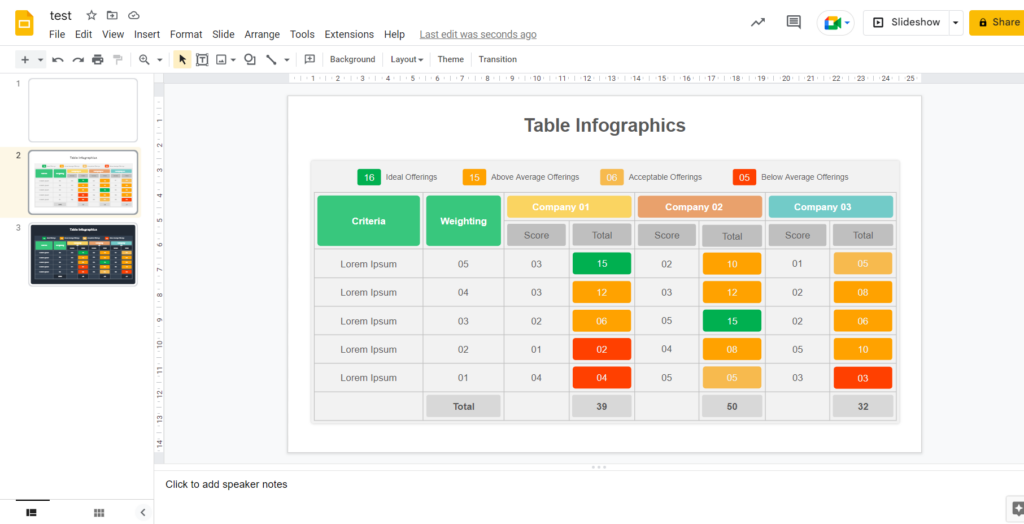
It is much easier to insert a table directly from a predefined template. You can find more professional and sophisticated table designs from our entire library of infographic templates. Just search for ‘table’ in the search bar, and you are ready to explore. To add a table from a template, just go to File, click on Import slides and choose the file you want to import. Then select the slides you want to import (Select All from the top if you want to import all the slides) and click on the Import slides button. All of the selected files will be imported into your presentation.
You can easily modify the table with your own data. The size, style, color, and border of the table, as well as the text, can be adjusted to highlight important data. The major benefit of using a presentation template is that it will save time and allow quick customization. You can invest this valuable time in making your google slides presentation look good.
Final Words
Google slides templates help to deliver attractive presentations within seconds. The effective usage of the capabilities of google slides saves your time and serves all your presentation needs. You can add tables, images, audio, and video to your presentation to catch the audience’s attention easily. Using matrices, charts, and graphs helps reduce the presenters’ effort, and the audience will have a quick understanding of the topic.