How To Do A Hanging Indent On Google Slides – 3 Simple Techniques

Some of you may have wondered about finding indented texts during a google slides presentation. Yes, you can add indentation to highlight the different citations in google slides too! Hanging indents are primarily used for formatting your texts, especially in bibliographies and reference pages. By highlighting the required texts, you could take advantage of hanging indents if your presentation had more images than text. Google slides allow you to add citations using 3 simple techniques. Now it’s time to get through this simple guide on how to make a hanging indent in google slides.
Use Of Hanging Indent In Google Slides
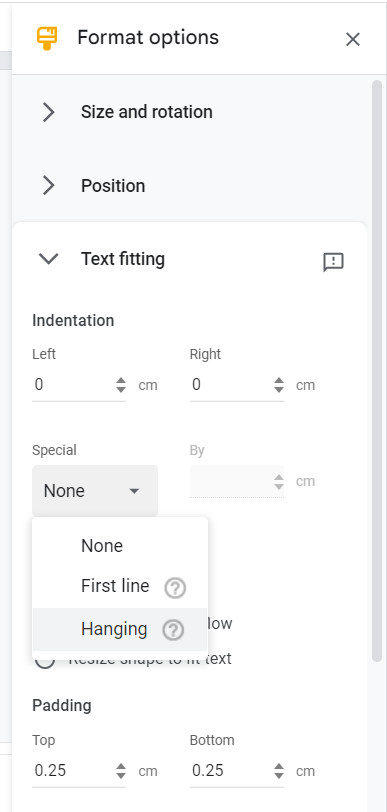
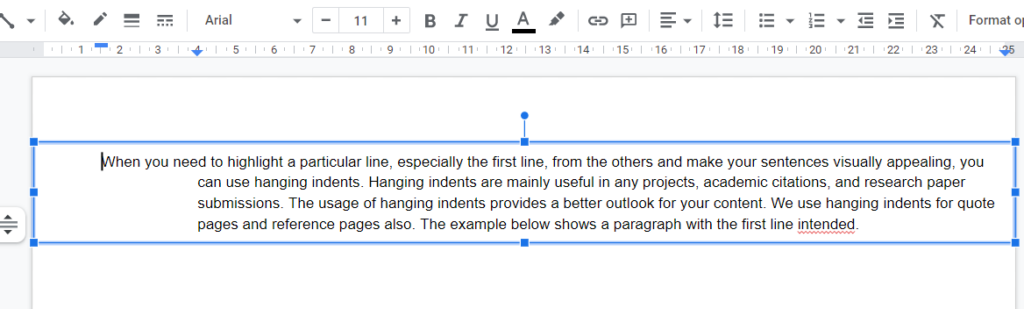
When you need to highlight a particular line, especially the first line, from the others and make your sentences visually appealing, you can use hanging indents. Hanging indents are mainly useful in any projects, academic citations, and research paper submissions. The usage of hanging indents provides a better outlook for your content. We use hanging indents for quote pages and reference pages also. The example below shows a paragraph with the first line intended.
How To Make Hanging Indents In Google Slides
There are 3 methods for adding hanging indents in google slides. All these methods are easy to follow and allow the indentation of a selected text.
1. Indentation Using Format Menu
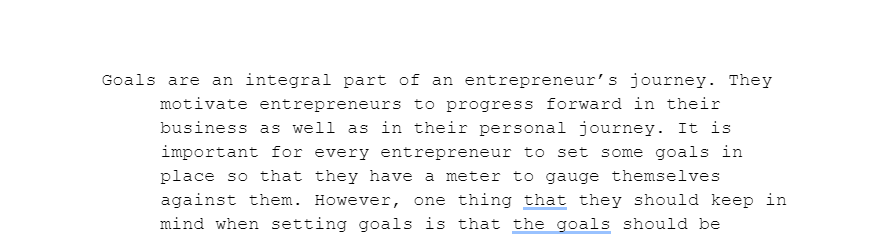
The Format button on the menu bar helps to customize the text and its attributes. For indentation using the format menu, first select the paragraph that you want to intend. Then click the Format button, and select Format options. This will open up the Format options sidebar on the right side. Then under the Text fitting option, select the Hanging option as the indentation.
Adjusting the indentation by increasing or decreasing the length will give the required amount of indentation.
2. Indentation Using the Keyboard
You can also use your keyboard to add a google slides hanging indent. First, select the line in which you want the indentation, then click Shift + Enter from your keyboard. This will allow you to place the text on its own line and indent that single line. After this, press the Tab button to add the indentation to your selected line. Hitting the tab button again will increase the length of the indentation, allowing you to specify the indentation limit.
3. Indentation Using The Ruler
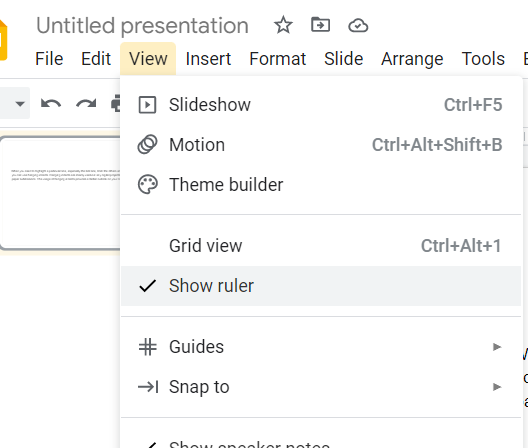
This method uses the ruler for indenting your sentences and might be the simplest of all the three methods. The google slides presentations contain a ruler at the top and left side of each slide that gives the option for aligning the text. The ruler will be shown as default and if you can’t find it, go to View and select the Show ruler option, which displays the ruler.
For adding indentation using the ruler, first select the paragraph in that you want the indentation to be done. As soon as you select the paragraph, the indent tool will appear on the ruler. You can find a First line indent control and a Left ident control in the ruler. The first line indent control will help in controlling the placement of the first line, whereas the left indent control helps in the left-side alignment of the paragraph.
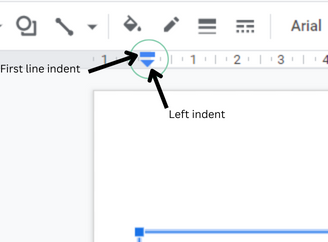
For indentation, slide the Left indent control toward the right, which will move the whole paragraph toward the right. After that, slide the First line indent control to the left up to the point where you need the indentation. This will gives you the required first line indentation.
If you need to indent multiple paragraphs, select those paragraphs and then follow the same procedures. Using this method, you can only indent the first line. For intending any selected line of your choice, you can use the other two methods.
Final Words
When it comes to text formatting, hanging indents have their own role in highlighting the content of professional work. Professional business presentations had a more successful set of audience than simple presentations. Indenting the required sentences makes the paragraph more meaningful and attention-grabbing. You can easily use hanging indents on your presentations by using any one of the above-discussed techniques. But remember, you could only add hanging indents on a PC and not on a mobile device.